|
|
| Original content created by community member: tordana08
|
Прохождение Дар-Нарбугунда
В данный момент прошло несколько месяцев с того момента как вышла 8-ая книга с новый подземельем Дар-Нарбугунд (далее ДН). ДН это рейд с 6-ю боссами перемежаемыми треш мобами, по сложности и длительности примерно равный Разлому.
Что необходимо знать перед входом
До того как войти в инсанс вам нужно знать следующие вещи.
- ДН сложный инстанс только для тех, кто не проходил его до этого. Удостоверьтесь что все в курсе того, что вайпы скорее всего будут, и что все готовы заплатить за ремонт.
- Прохождение ДН займет около трех часов для опытного рейда. Если вы идете туда первый раз, будьте готовы потратить 4 часа на прохождение.
- Многие мобы в ДН не любят подвергаться Контролю и будут накладывать на себя Баффы если вы будете пытаться делать это. Подробнее ниже.
Что необходимо иметь перед входом
Следующие вещи должен иметь каждый участник вашего рейда
- По стеку банок Ацеласа и Келебранта 51-58 ур. По стеку банок с силой 65 для лечения Болезней, Страха, Яда и Ран.
- Два Дара Эдельхара +5 (15, 30, или 40 минут), два свитка Защиты и Атаки.
- Важно! Каждый должен иметь 65 Радости от одежды. Это может быть достигнуто одеванием 4 частей Радианс сета, одной заглушки и одной вещи из нового сета с +15 Радости. Либо Шлема либо Наплечников с Вотчера . Либо 4 части Радианс сета, 2 заглушки с Радостью и +1 к Радости за очки судьбы.
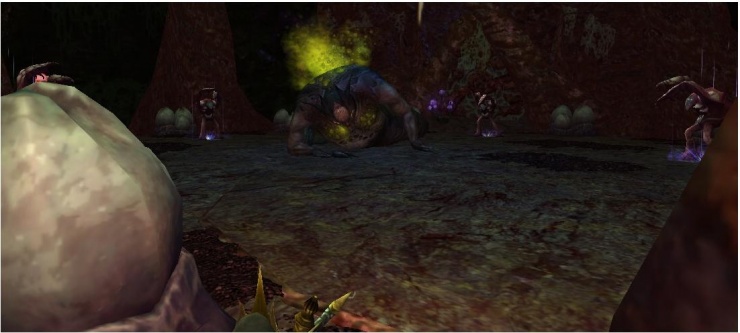
Первые боссы: Тролли
Войдя в инстанс, вы окажетесь в коридоре ведущем в большую комнату полную мобов, с двумя троллями ходящими в центре. Эти тролли первые боссы, с ними вы будете драться одновременно. Весь рейд остается в коридоре, а Хранитель Мудрости пулит группы мобов к вам. В большинстве случаем он усыпляет самого толстого моба (тролля) и даёт другим забежать к вам. Важно! Тролля желательно контролить только один раз, при пуле, каждый раз когда вы будете накладывать сон, корни или страх на Тролля, на нем будет появляться стакающийся баф на +25% к дамагу и скорости атаки. Таким образом, усыпляйте каждого тролля один раз для 30-ти секундной задержки, по истечении этого времение ваш танк должен быть готов забрать его на себя.
Мобов в комнате на 4 пулла, как только вы вынесете всех, можно начинать развлекаться с троллями.
На этих двух парнягах применена интересная фишка: Дамаг по одному проходит по другому, тот же кого вы бьете этот дамаг поглощает. Но при этом дебаффы примененые на конкретного тролля, на нем же и применяются, увеличиващие дамаг скиллы (Слабое Место, Клятвопреступники) должны также применятся на того тролля которого вы бьете, а не на того кого вы дамажите.
Вторая вещь которую стоит упомянуть - у обоих троллей есть специальная атака, спавнящая кислотную лужу (по три от каждого тролля, максимум 6) под рандомным членом рейда. Если в момент каста лужи спрятаться за колонну они могут так и не появиться, на танкующего лужи не вешаются. Но если вы все же видите появляющаюся под вами лужу, БЕГИТЕ! Прерывайте все ваши касты и сматывайтесь!
Наконец, оба тролля периодически бегают к рандомному члену рейду и тюкают его по башке, агро при этом остается на танке. Просто смиритесь с этим и отлечивайте тюкнутого, вы не можете предотвратить это. В итоге они всё равно будут возвращаться к танку.
До того как начать бой, примените Дар Эдельхара, Свитки Атаки и Защиты, купите надежду за очки судьбы, then have your tank run in and aggro both of the big guys. Give him a few seconds to build aggro, then have your target assist start hitting one of the trolls. You want to bring both troll's health down approximately equally during this fight. So, attack one until the other is down to about 200k. Then, attack the one at 200k until the other is down to 200k also. Once they are both at 200k, bring them both down to 150k using the same method. At this point, get ready to start a mad DPS dash. As soon as one troll goes below 120k, the other troll will begin stacking buffs on himself approximately every 30 seconds. These buffs increase his damage. Note that these buffs will be on the troll you're hitting, not the one you're actually damaging (yes, this is confusing). In order to minimize these buffs for the last part of the fight, you want to bring down one troll from 120 to 0 ASAP, as the buffs stop stacking (but previous ones remain) once one troll dies.
So, when both trolls are at 150k pick one to start whacking. At 120k, hit the troll you are hitting (it will increase damage to the other) with Oathbreakers, and another Oathbreakers at 60k. At 10k left, Important! all people in melee range except the tank run away from the two trolls and let the hunters finish it. A poisonous mushroom will spawn on the tank as soon as one troll dies, and you want only the tank standing in it, as it hurts. A lot.
Now, take a deep breath. Ideally, at this point you have one troll dead, the other troll at about 150k, the remaining troll with 3-4 buffs on him, and your tank standing by himself in the middle of a poison cloud.
Time to finish it! All damage will now actually be done to the guy you are hitting. The easiest way to polish off the fight is the slow way -- leave your tank in the mushroom and have everything with ranged attacks plink at the boss from outside it while your minstrels spam heal the tank. Alternatively, you could have your tank keep moving outside the poison cloud to let melee in to hit, but then the troll will just keep dropping more, and soon you have nowhere to stand. Doable if everyone in the raid has excellent positional awareness, but if you had any trouble at all with acid puddles best to do it the slow way.
Both trolls dead? Good. Enjoy your boots, and some IXP and runes out of the chest.
It has been noted that keeping the trolls separated throughout the fight will sometimes cause them to not stack up damage buffs in that phase near the end of the fight. However, this can be difficult to do if you do not have two good tanks, and they sometimes seem to stack buffs even when separated.
The Crossroads
Now, you've got some trash to deal with. Again, don't mez or root anything more than you absolutely have to. Best to blender your way to the bottom of the room, having tanks pick up trolls and everybody else burn the orcs and goblins in your way. If you managed the trolls, all the trash in DN will be easy, so I won't spend many words on it.
At the bottom of the room, you'll see a couple new enemies: fumaroles (bringing back memories of the Rift?). These things are harmless, as long as you deal with them. For each pull with fumaroles, assign one hunter per fumarole to kill the dust balls that spawn out of them. These things will do no damage on their own but apply nasty debuffs to your raid (that is invariably fighting the rest of the trash pull). Hunters can one-shot these things before they get anywhere.
Also, you'll see Snarling Overseers here. These are harmless mostly, as long as you use corruption removal! Let the corruptions stack up and you'll be in a world of pain as they disarm and silence your entire raid. You have been warned. Also, these overseers will stack buffs on themselves when CC'ed like most everything else around here, so you will want to deal with them first on pulls where they appear.
Once everything is dead, you'll see three paths to proceed along. Take the left.
Zholuga
More trash, yippee! Kill it, using the tactics outlined before, until you get to the giant fumarole (ooh, scary). Important! You'll see Dark-Maw Masters here for the first time. They *can* be CCed any way you like, make use of this. However, note that for each mob killed prior to them in a pull, they will stack a -20% incoming damage buff on themselves. This isn't a huge issue, but take note of it as you'll often want to kill these guys last since they're safe to mez. Now, clear out the stuff around the fumarole with careful pulling (you can leave the group on the close left there, they won't aggro anyone if you stick to the right) until the room is clear except for the one pull I just mentioned. Now, you've all done the Turtle right? Yeah, I'm sure you have. This fumarole is a little miniature turtle. Just kill it fast before the increasing DoT aura overwhelms you. And, it's time for Zholuga!
This guy is stupidly easy. He should be interesting and somewhat challenging. But, he isn't.
Pop your tokens and scrolls and have your tank grab him. After a few seconds, he'll shout some nonsense at you and buff himself. (Blue = -incoming damage, Green = he does nasty AoE dots) At this point, a crystal surrounding the room will light up. Only certain classes can use these to shut them off and remove his buff:
- Blue -- Burglar, Loremaster, Hunter
- Green -- Minstrel, Runekeeper, Captain
- Red -- Champion, Warden, Guardian
If the crystal you get is blue or green, get somebody appropriate (pre-determined before the fight) to go shut it off ASAP. I recommend a Burglar for Blue, Captain for Green. Repeat the process until you get a red (should be second or third one).
Got a red buff on him now? OK, good. Kill him. Don't touch any more crystals.
Yeah, it was that easy. Enjoy your gloves!
The only other thing to note on this fight is that your raid should be spread out, as the Green poison DoTs are contagious. Just stay away from everyone else and you'll be fine (and he should only be in that phase for about 5 seconds anyway). If someone does obtain a poison DoT (it appears in the form of an eye above their head) have them move well away from the raid until it disappears.
Flagit
Make your way back to the crossroads, and this time take the right portal. You'll have some more trash to clear here, nothing that you haven't seen before. You'll encounter a split in the road here, left will lead to Istum while right will lead to Flagit. Flagit is, counterintuitively, lock 3 and Istum is lock 4 to his left, so I'll go over Flagit next.
You'll see another giant fumarole here, deal with it the same way as the last. Easy stuff. Time for Flagit!
The most important thing to note about Flagit is that the whole raid must be inside his room (past the stone outcroppings forming an "entrance") at all times, except when outlined below.
Flagit has two special moves to watch out for.
- Important! He will call the name of a person in the raid. That person must exit Flagit's room immediately. Once they see the eye over their head disappear, they must re-enter. If a person is already outside when their name is called, or they don't get out in time, they will die. And anyone standing within a very large radius of them will die. That simple. Note that the tank (whoever currently has aggro) will never be called.
- Also Important! You will see red flames appear around his body briefly, followed by a large, obvious shield. As soon as you see the flames, someone call it out over voice, and everyone stop attacking immediately, including autoattacks. Have your tank shut off his autoattacks or face away from the boss. Think of this as a large game of Red Light, Green Light. Go while the light is red and you're out (well, actually you heal the boss for 5k each time you hit him. And maybe your raid leader will kick you out. :P) Once the shield winks out, you can attack freely.
- You can also have all members of the raid target the Tank with the Skill Target Forwarding option turned on. This means that only the tank has to deselect Flagit to get the entire raid to stop attacking. Pressing F1 is a good way to quickly deselect, as it targets your character.
As the fight winds on, the two specials will start coming faster and faster, and you'll have people running in and out all the time and starting and stopping about every 15 seconds. Keep your cool and you'll get him down. Enjoy your helm.
Istum
Go about halfway back to the Crossroads and take the other fork in the road to head to Istum. More trash, nothing that you haven't seen before. And, another giant fumarole. You should have no problems if you've gotten this far.
Istum is the most difficult of the three orc bosses, but still easier than the trolls so don't get too worried.
As with the other two orcs, this is a tank'n'spank with a couple of twists.
Istum has four special moves to watch out for:
- He will do a whirlwind sort of move that will damage everyone a bit and toss everyone around the room. Not a huge deal.
- Important! He will drop acid puddles like the trolls. Watch for them, don't stand in them.
- Very Important! This third move is the toughest part of the fight. He will periodically summon 4 crawlers into the room. Each of these will, if they touch someone, explode, dealing 1k-2k damage to everyone nearby. Obviously, this can be painful, especially if all 4 hit you. For the first half of the fight, the crawlers will all spawn in the middle of the room. Position a champion there, and keep everyone else away. The instant the crawlers pop, the champ should let loose with a big AOE to kill all four. No harm done. If he's too slow, well... at least you only had a champ die. ;) Later on in the fight, one crawler will spawn in each corner of the room. Assign one person to watch each corner, hunters work very well for this.
- Once Istum gets to about 100k health remaining, he will begin to turn random aggro and only respond to force taunts. Fun, eh? Just have your minstrels keep their eyes open, drop Fellowship's Heart if needed (it probably will be), and don't panic, he'll die soon enough. It has been noted that he is not 100% random during this phase: he will in fact cycle between attacking the tank and attacking randomly, but for all intents and purposes treat it as random.
Enjoy your shoulders!
The Blind One
Ah, the fun is about to begin. Take your raid back to the crossroads and proceed through the middle door. You'll have a few trash mobs to clear before the fight. A lot of it you'll have seen before, but there is one new mob, the World-Eater. These guys cannot be CC'ed in any way (they don't stack buffs, they're just immune), so you'll want to designate tanks to them until you are ready to kill them. Use similar tactics to the trash trolls found earlier in the dungeon. Now, these guys have two special abilities.
- The world-eater will cast a patch of dark tentacles somewhere on the ground, centered on a member of your raid. Anyone standing in this patch takes minor damage over time, but also has -90% outgoing AND incoming healing. Obviously, don't stand in it. The world-eaters tend to cast this on minstrels most frequently, so keep your eyes open and stay moving. The patches will root you for about 4 seconds before you can move out of the way when they first spawn. One would think the -4 second root boots from DN would prevent this, but in fact they do not. You just need to deal with it.
- The world-eater will apply debuffs to members of the raids saying they will incur the world-eater's punishment if they are high on the aggro list. The world-eaters tend to cast this around 15k, and will nuke everyone with the debuff a while later. If your DPS on a world-eater is reasonable, they'll never actually get this attack off, and that's the easiest method of avoiding it.
Once the trash is down, prepare for the Blind One! This is by far the most difficult fight of the dungeon, so get ready for it. Every single person in the raid has a job to do, and if any one person isn't doing it right you will wipe. Be sure everyone in the raid is listening hard when you explain this fight.
Important! If at any point during this fight a wipe is guaranteed, have everyone still alive run to the right corner of the door you entered. The BO will reset as it attempts to hit them, leaving (hopefully) somebody with a rez still alive to get your group up.
The Blind One -- First Phase
The Blind One's room is roughly circular in shape. You will note black portals on three walls. Do not touch them, you die instantly. Now, the most important part of the first phase is positioning. You have 12 people in your raid. You will want two of them (a guardian and a champion), on the center platform, where the BO stands green. The other 10 will be spaced evenly around the room. Picturing a clock face, where the door you enter is 6 o'clock and the opposite side is 12 o'clock, you will have essentially one person for each hour. I recommend placing your minstrels at 1 and 7 and your captains at 4 and 10. This will ensure each minstrel can heal one captain, each captain can heal one minstrel, all healers can reach the two in the middle, and the other 6 people in the raid can all be reached by one minstrel and one captain.
Also, note that the BO has a damaging aura that will hit everyone in melee range for 500 a tick throughout the fight. In addition, it will hit anyone ENTERING or LEAVING the aura range for 1k. Don't go next to him unless you are one of the two tanks, or perhaps a burglar running in briefly to apply a debuff (warn your minstrels first, burgs!)
Be absolutely sure when planning positioning that everyone is as far as possible away from everyone else, except for your two tanks. Now, ready to go? Good.
Phase One lasts from his starting health to 440k. The Blind One has three special moves during this phase:
- He will randomly apply a green eye to one member of the raid. This is contagious, and will spread to anyone near you. It will do a few ticks of a damaging DoT (about 2k overall), and then expire. If nobody is near you, that's all it does. If they are... they get the eye. And then give it back to you. And then... you get the point. Don't pass it around.
- He will randomly apply a red eye to one member of the raid. This is very similar to the green eye, except it nukes you for 2k all at once when it expires, then passes to anyone near you. Again, don't stand next to anybody and you'll be fine.
- This one is why most groups wipe in phase 1. He will punt the tank that currently has aggro, and wipe all aggro on that tank. The other tank must be ready to instantly pick up aggro with a force taunt to prevent the boss from running after a ranged attacker. Important! Hunters: keep absolute minimal threat during phase 1. This means staying in endurance and using nothing except quick shot and autoattack -- perhaps not even autoattack! Haste will kill you in this phase. Be patient and drain his health slowly to proceed to phase 2.
The Blind One -- Second Phase
Everybody still alive? Good. The second phase begins at 440k and lasts until 200k. During this, the special moves from phase 1 disappear, so feel free to group back up (we do it near the door we entered). Keep your tanks in the middle. The BO has a new battery of three specials here, and here they are:
- Darklings will periodically spawn and run at someone in your raid. When they collide, the targeted person will be sucked into a hole in the floor, unable to do anything for 10 seconds. However, that person may still be healed and attacked. BUT, their aggro is reset to 0 while in a hole, and bounces back to what it was before as soon as they exit. This is why you still need two tanks here, in case one gets sucked into a hole. Also, it is possible for both tanks to end up in holes, if that happens don't panic. Keep everyone alive until one pops back out, the BO will turn around and run back to the tank immediately.
- The BO will spawn the same tentacles on the ground that the world-eaters you've seen did. These will 99% of the time spawn under a minstrel. So, minstrels, once you see them, move out of the way to avoid the -90% outgoing healing debuff.
- The BO has an extremely nasty melee AoE attack. As in, one-shot guardians on crits nasty. This move can be interrupted. Thus, your burglar must make it a priority to spam addle on the BO, while your champion clobbers every time he sees the induction start (signified by an orange ring around the BO).
The second phase is the easiest of the three phases, it shouldn't be any trouble if you got the first one done.
At about 210k left on the BO's health, have your burglar dash into melee range, he'll be staying there during the third phase and needs to be ready.
The Blind One -- Final Phase
OK, the BO should now be at 200k, everyone is still alive, and you have a guardian, champion, and burglar in melee with him. Good work. Time for the hard part. :) There are now FOUR things to watch out for, each nastier than the last.
- Tentacles still come, as in phase 2.
- The AoE attack still comes, but much more frequently. Now is the time for your champion to prove his worth, with clobber's short cooldown he should be able to get all of them. Your champion will be essentially spamming clobber only during this phase, he should not worry about dps whatsoever.
- The BO starts stacking damage boost corruptions, a la the Watcher. These come about once every 1 second (No, This was listed as 5 seconds, but it is MUCH quicker than that. I would estimate it to be 1-1.5 seconds. Anyone know for sure?). The way to deal with these is to have your guardian make liberal use of Sting, your champ make liberal use of feral strikes (in between clobbers), and your burglar do whatever-burgs-do-to-remove-corruptions. In addition, Important! anyone else with a burst corruption removal (three at once) should be set up in a rotation (this includes hunters and Loremasters particularly). Hunters should never use merciful shot unless it is their time in the rotation throughout this phase. Have a raid leader call out the first burst for each member, one every few seconds, then instruct them to hit it again immediately after the skill cooldown expires. Doing all of this should keep corruptions to a minimum.
- You thought corruptions were the worst part of this? Ha! The Blind One also begins summoning doppelgangers of himself every 45 (confirmed, thanks topic posters) seconds. These do not use any of his special abilities, and do not have a poison aura, but they do it hard. Oh, and they each have 500k morale like him. How do you deal with this? Your loremaster. They CAN be CC'ed any way you like -- root, stun, mez, fear, anything. Use it all. Your LM should be going nuts here keeping everything down he possibly can, but other members should also use their CC if needed (minstrels, got one beating on you? Fear it off.) When your LM starts to get overwhelmed (should be around 80k), have a minstrel cast Call to Greatness on him for extra mez goodness.
- An alternate method of dealing with the doppelgangers makes use of the fact that they take heavy damage from being CC'ed (as in tens of thousands of damager per CC application). If everyone in the raid hits each spawn with all the CC they have, you can kill them as they spawn. Also, (unconfirmed) they may spawn faster if you do this strategy: every 30 seconds instead of 45.
At anywhere during this 200k, use your two Oathbreakers for more damage (but hunters, DON'T use merciful during the oathbreakers unless it is your turn! Also don't burn hot, you can't expect the LM to give you power during this phase). Everyone suck down the morale and power pots when you can, as your battery is currently fighting for his life against multiple doppelgangers. Minstrels put down Fellowship's Heart at about 50-60k, captains drop in with IHW+LS after that runs out, and hope enough of you survive to finish him off!
Enjoy your well-earned leggings. Also a note, anyone stranded in the middle is still within range of the chest. And, anyone dropped through the hole that opens when he dies can find a door down there that'll teleport you back to the crossroads, from where you can run back to the chest.
The Mistress
 Well, you probably think the Mistress will be insane after that fight against the Blind One, right? Nah. If you can kill the Blind One, you WILL kill the Mistress. The difficulty doesn't even compare. And on that note, let's be off! Drop through the hole in the Blind One's chamber that opened when he died, and follow the passage around to the Mistress. No annoying trash here to deal with. :) Pop your tokens and scrolls, and let's be off!
The Mistress -- First Phase
You'll see four world-eaters surrounding the Mistress. You've gotta take those down first before she activates. Now, to make it interesting they will cross-heal each other if close enough. Otherwise they're identical to trash you've seen before. So, here's the deal: Have a guardian + minstrel pair go occupy the two on the right, a la Thrang. Have a captain tank the back left one, while your champ tanks and the raid burns down the front left one. Then move around to the back left and kill it, followed by pulling one of the two off the guard and killing it and the last one. At this point, Important! You will be out of combat for long enough to eat food immediately after the last one dies. Make use of this. Now, the mistress activates! Have your guard pick her up.
The Mistress -- Second Phase
From full health to half health (about 250k), the fight is really quite boring. The mistress has a DoT aura that will do increasing damage as the fight wears on to anyone near her (also the range expands as the fight goes on). Also, she will spawn little clouds that run around as if enraged and whack people. They also add buffs to the Mistress if enough of them are alive. However, they can be killed with one application of any form of CC. Other than that, heal through and tank'n'spank. Next phase.
The Mistress -- Third Phase
Once the Mistress turns green at half health, have everyone spread out. Stay away from others, but still preferably within healing range (minstrels in the middle if possible). You will have three waves of a LOT of adds. They are all swarms, and die very quickly. However, they all use a frontal AoE attack. This is why you spread out. ;) Burn down the three waves, it shouldn't be that bad if you got this far.
An alternate method for dealing with this phase is to clump up and get into an AoE fight: your champions versus the mobs. Your raid will take quite a bit of damage, however you should be able to burn down the mobs incredibly fast and survive.
Thanks to Wyldcyde for reminding me that at this point, everyone needs to get away from the edges of the room! There will be an acid cloud ringing the room as soon as the third wave of adds dies.
The Mistress -- Final Phase
At this point, the Mistress will become attackable again, have your guard grab her once more. At the same time, you'll have three adds run in. These will each target one member of your raid and use a channeled mez on them. Important! Killing the adds is your entire raid's first priority. After about 10 seconds of being mezzed, a targeted player will have a debuff placed on them. 20 seconds after that, if that add is not killed the player will die. Simple as that, and nothing can be done about it since they are mezzed. Everyone still functional when the waves of three adds comes needs to burn down the adds ASAP, then get back on the Mistress. It helps here to have the raid bunched up so that AoE can be employed against the adds.
Other than the adds, the Mistress doesn't actually have any special attacks to watch out for, other than occasional AoEs you can't do anything about. Just kill her.
Enjoy your wondering if that was REALLY the end, and your chest piece. :)
Closing Thoughts
Congratulations, you've completed Dar Narbugud! Hope this guide was helpful, and hope you enjoy the dungeon as much as I do. Who knows how many weeks you'll spend in there before we get another new raid to do.
Acknowledgements to my former kin Defenders of the Greyflood for being the other 11 guys working together to figure this dungeon out, and for pointing out the stuff I forgot in this guide on our kin forums. :)
If you have any questions/additions/corrections to be made, please feel free to post here or send me a private message either on the forums or in-game. Thanks! Doing a guide entirely with text is difficult, but I attempted to cover the basics. It's guaranteed that there's some points I forgot, so still be prepared for surprises if using this guide. ;)